A typical project for us consists of many exciting challenges. If you read our other posts, you’ve probably realised that we’re not just VFX people. We have knowledge and skills in all aspects of getting that shot and Jericho was no different. We had a vast range of different challenges that you’ll have an insight into if you read on.
A short reel of some select shots from the show
Plan Well…
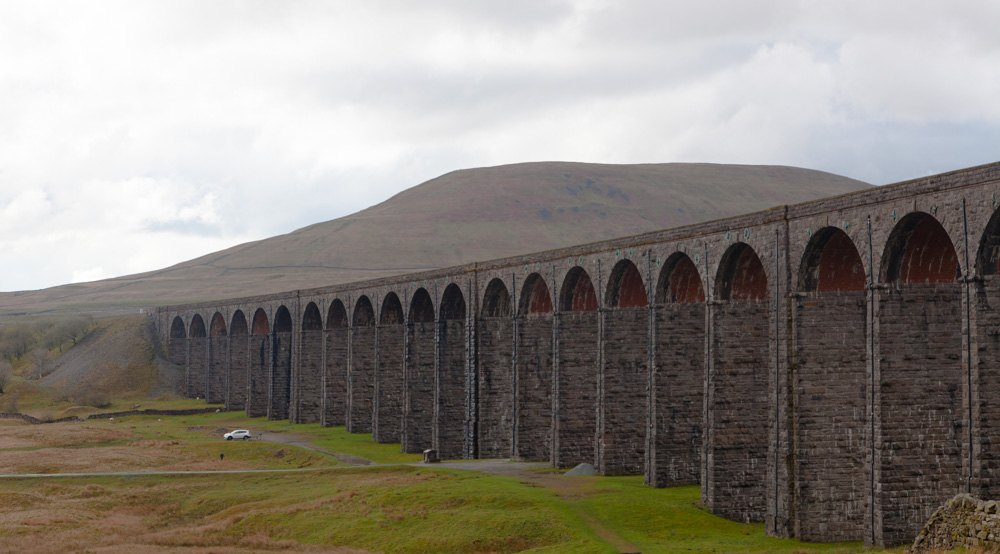
Yep, the army was right; Proper Planning and Preparation Prevents Piss Poor Performance; the seven P’s. With that in mind, we embarked on the making of Jericho. It’s a story about the activities of several Navvy families around the construction of a giant Viaduct, which would connect the railway with two sides of a Yorkshire valley for the first time in history.
All the Vis
There are eight episodes in total, with approx. 80 shots in each EP. One of our biggest challenges was the creation of the viaduct and the land that surrounds it. The challenge was to combine three different locations into one scene with a giant CG structure juxtaposed with a set build.
The first step was to pre-visualise the hero scenes. Working very closely with the art department and director, we agreed on the fundamental parts of each location. The narrative dictated a particular journey from the town to their place of work.
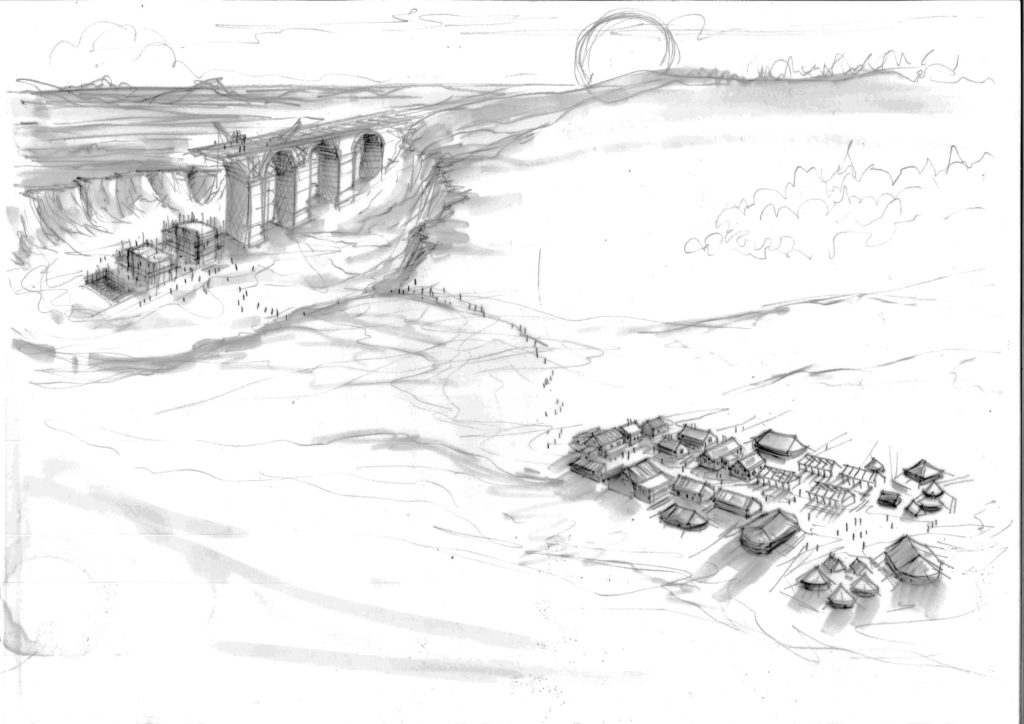
The concept drawing supplied by the Art Dept. shows the proposed location of the shantytown from the building site. It was important to get this right because the journey featured as a plot point in the show.
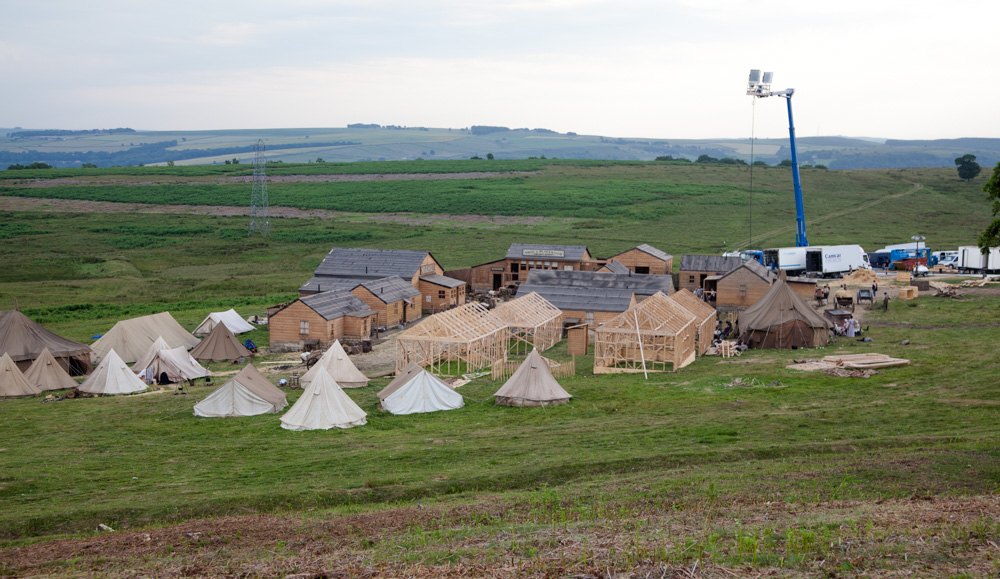
The shanty town set 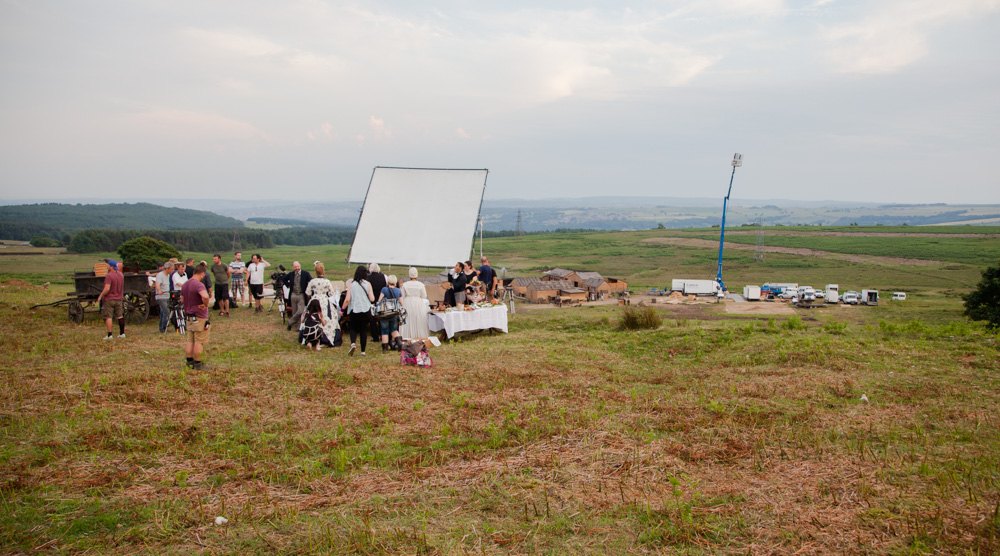
A picnic scene discussing the progress of the build
A typical shot was split into three:
- Foreground – The town location
- Midground – The quarry location
- Background – A Yorkshire valley
For us to plan, we set out to layout the different areas into one CG scene. All of the sites and critical assets were captured with a combination of laser scanning and photogrammetry, providing scale, accurate to life CG proxies. This data was processed into lightweight meshes that we could use in our planning.
The clip demonstrates a turntable of the initial layout combining all of the locations.
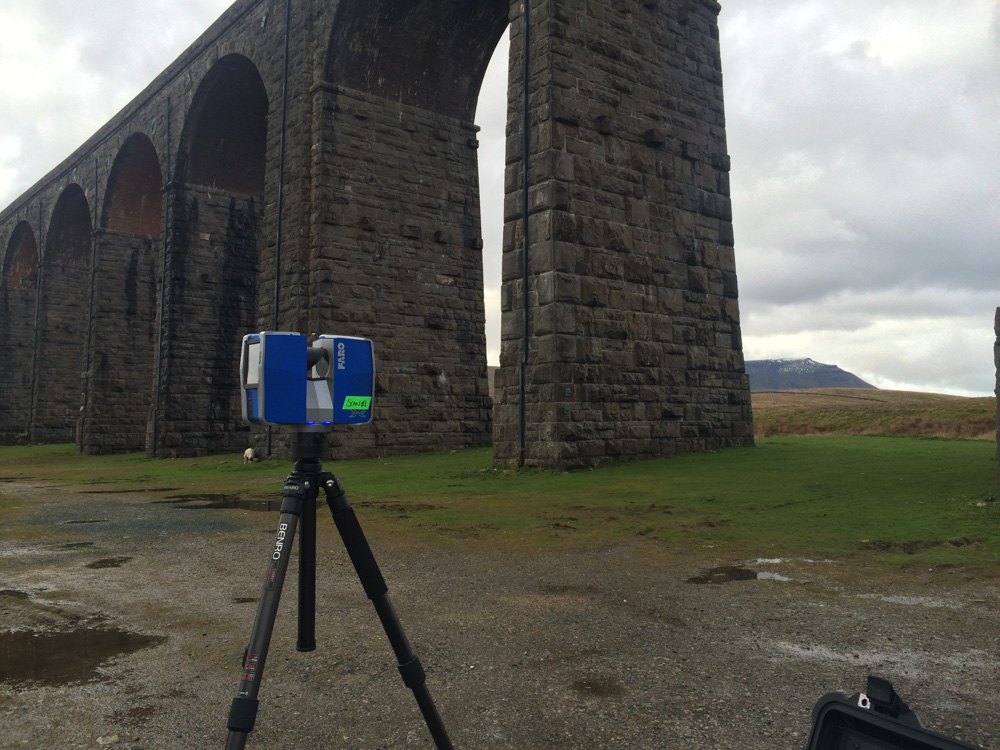
The interactive point cloud below is an example of the LiDAR scan data, which is then meshed into a renderable asset.
Roll over the image and explore. A three button mouse works best.Ready to Shoot?
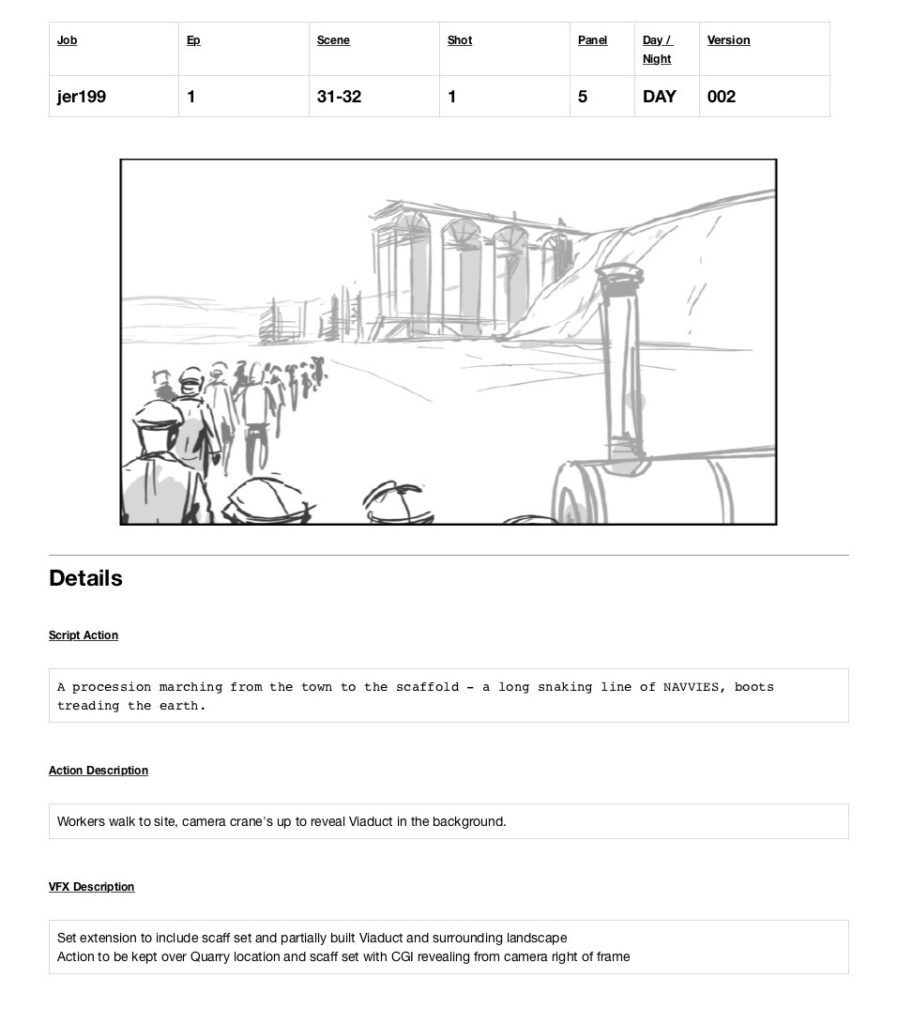
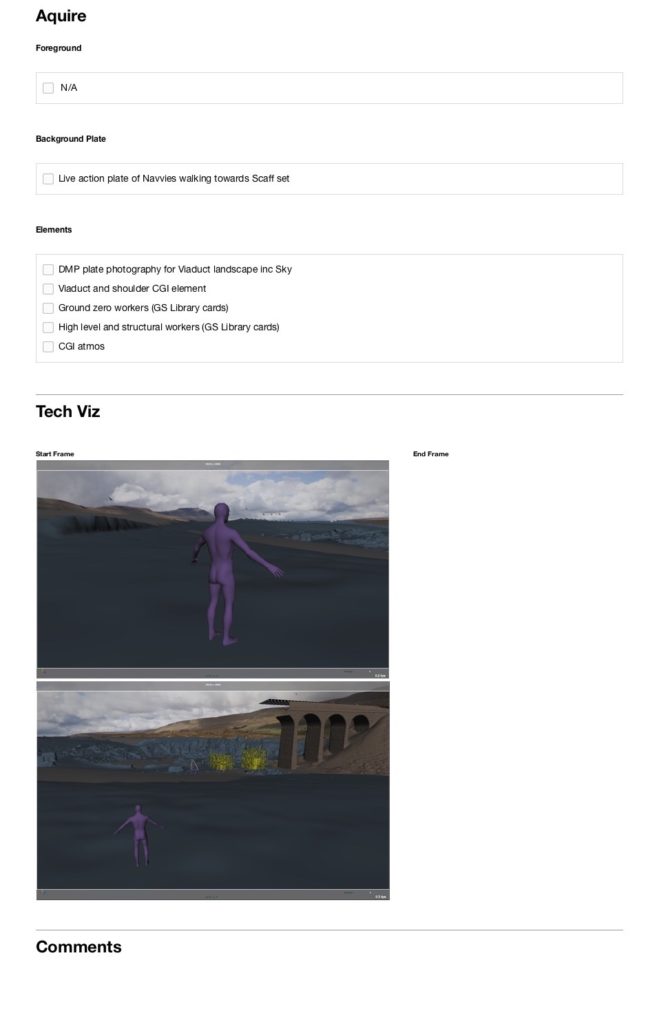
Once all the layouts are approved, we can move onto some rudimentary pre-vis, using a comprehensive set of storyboards. This stage mocks up the primary action and camera movement that the director would like to capture on the day. The pre-vis can then be turned into tech-vis, meaning a level of accuracy is introduced, used for further planning.
For each shot that has been planned, we create a breakdown document, which enables excellent communication with the production team and efficient capture of all the necessary elements. Below is an example of a working document for the opening shot.
Capturing Elements
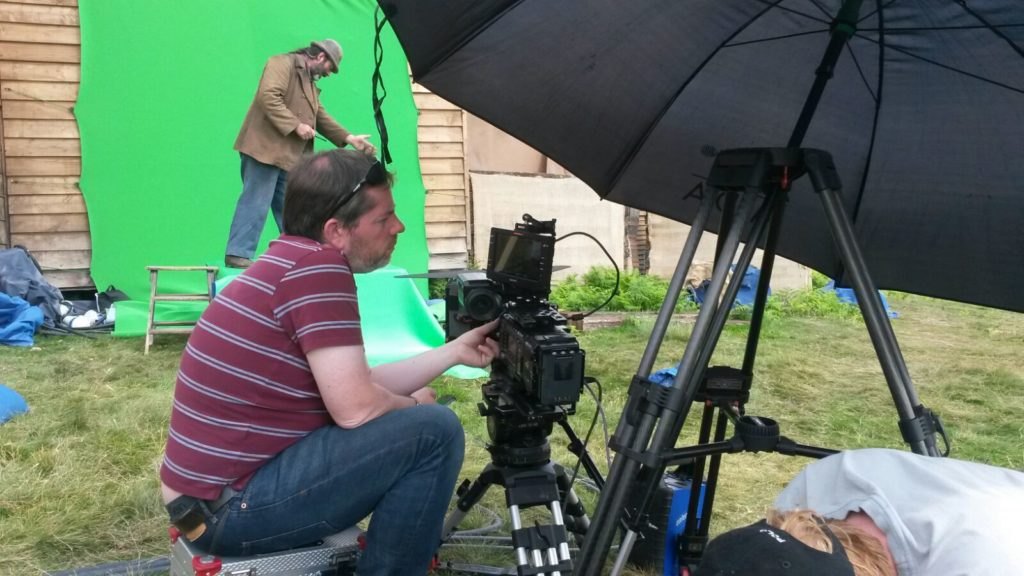
During the shoot, we were very much part of principal photography. We supplied both creative and technical supervision on the critical days, but we also captured and acquired our own elements and data. Because many of the shots required so many parts and several of these layers would be entirely bespoke, we designed and deployed many exciting ways of capturing our plates.
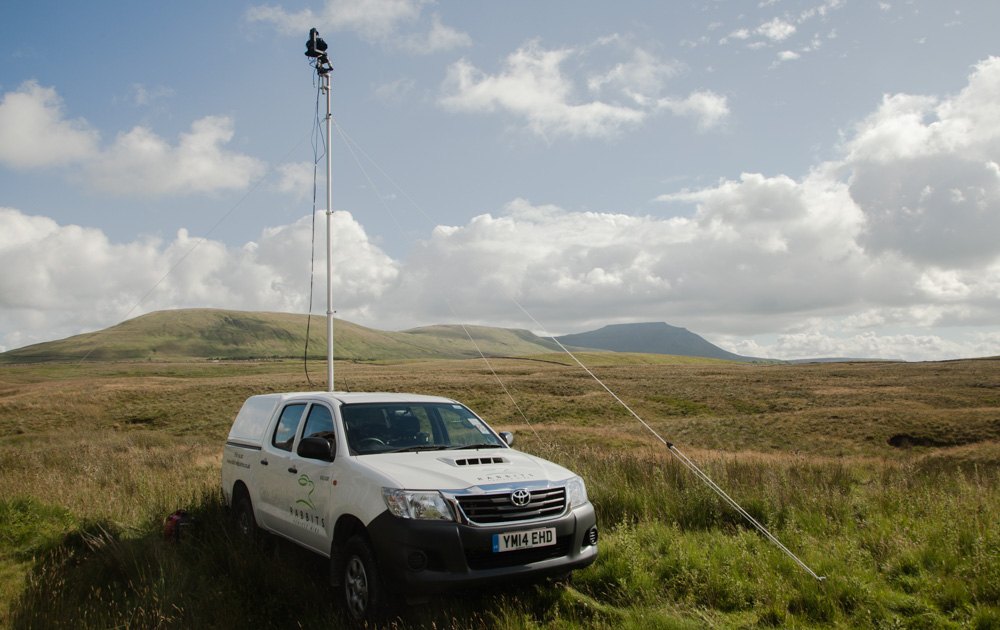
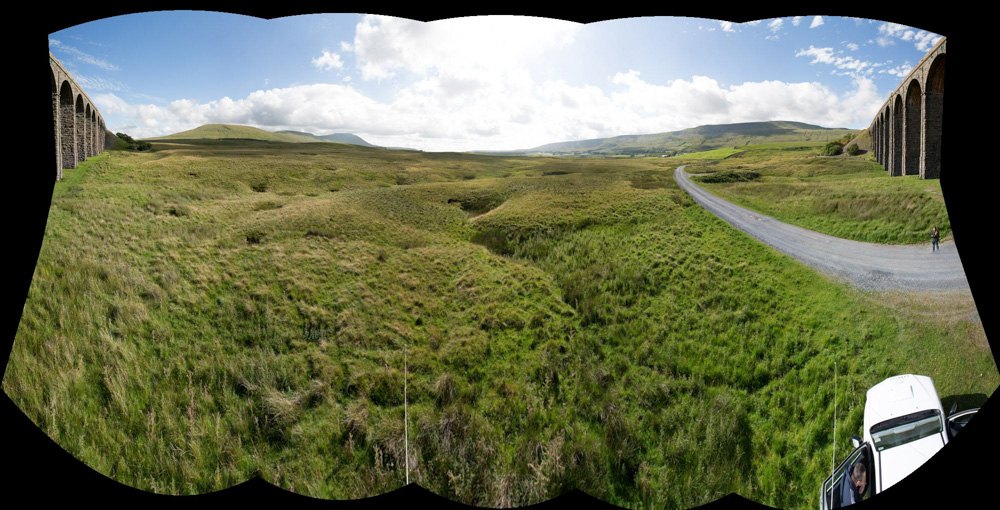
For the hero shots of the viaduct, like the one below, It made sense that the actual scenery of the Yorkshire landscape that surrounded Ribblehead could be used for pour scenes too. We set out by building a bespoke 7-metre mast that was attached to one of our set vehicles. It provided an excellent height for which we installed our Motion Control pan and tilt head. We can reprogram the head to act like a Gigapixel device, enabling a large stills plate camera to be controlled remotely. It can photograph a vast panoramic shot at very high resolution; once stitched into a single image (46k) it was ready for digital matte painting.
Our pickup in the rough 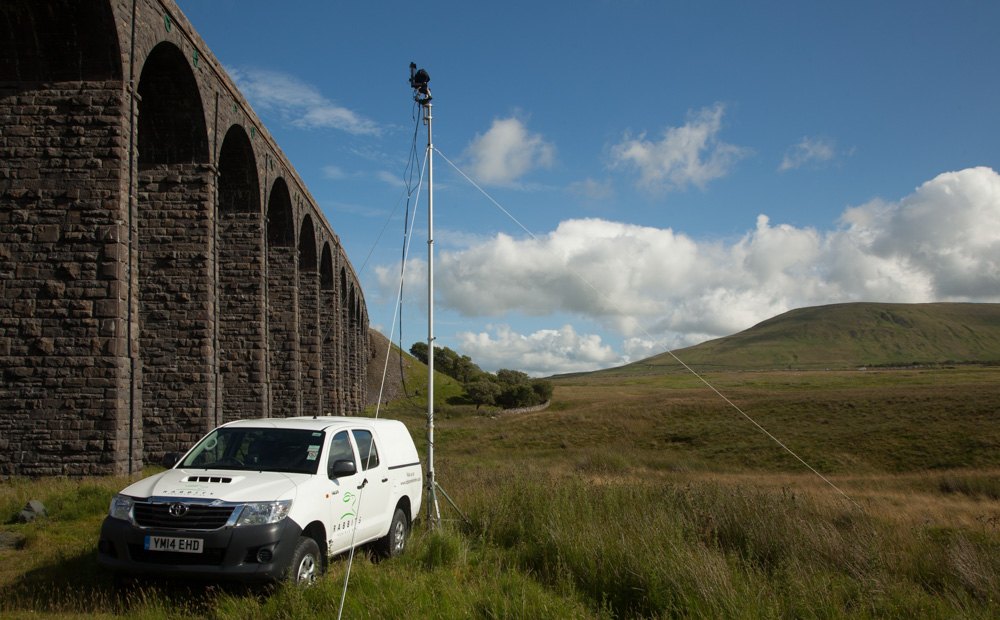
It’s a waiting game
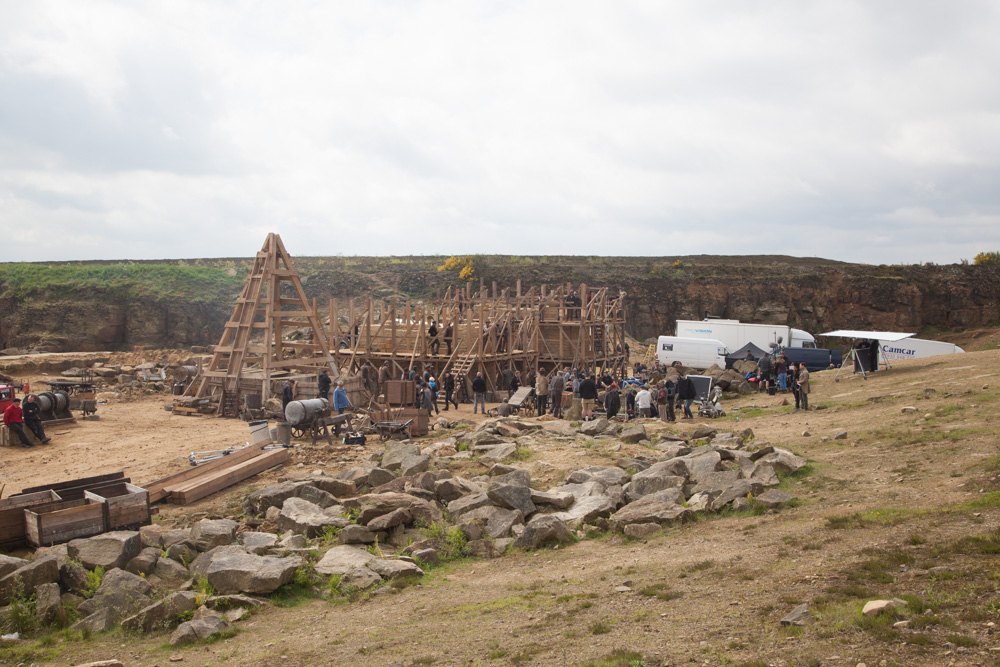
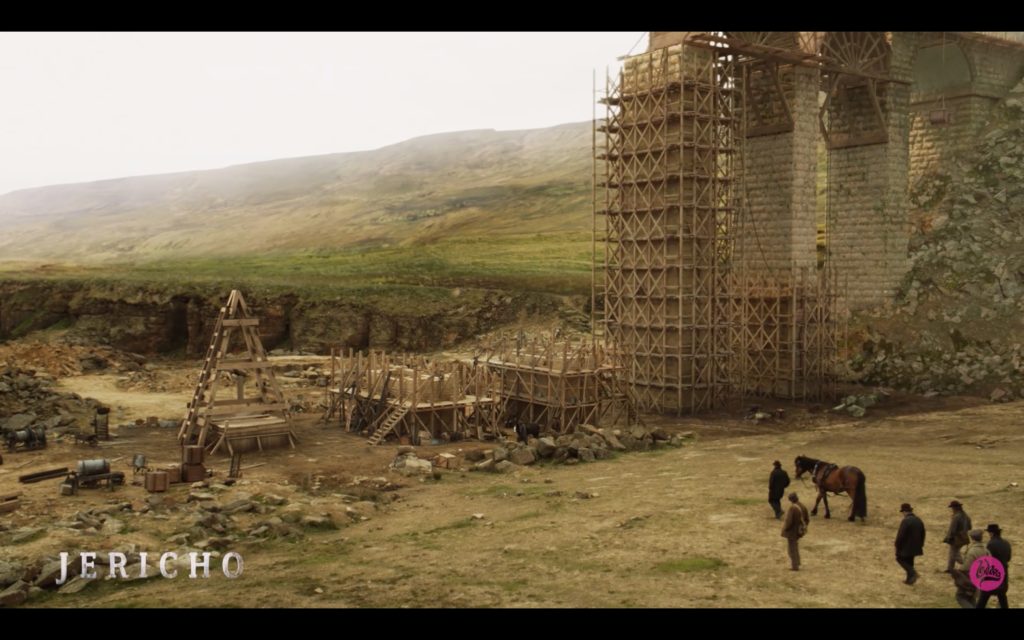
You can see how the large format photography was used in the first big reveal of the viaduct. Below is a shot of the quarry with the set and the final shot. All of the backgrounds used plates shot in Yorkshire.
The same method worked very well to capture large moving plates and shots from the top of the CG viaduct, looking down. However, this time we mounted the Motion Control head onto a 100 ft mast. Usually used in the comms world, we repurposed it to shot big plates using our Sony F55. These plates would have been used to accomplish a big chase sequence at the top of the viaduct but were later cut and set at ground level.
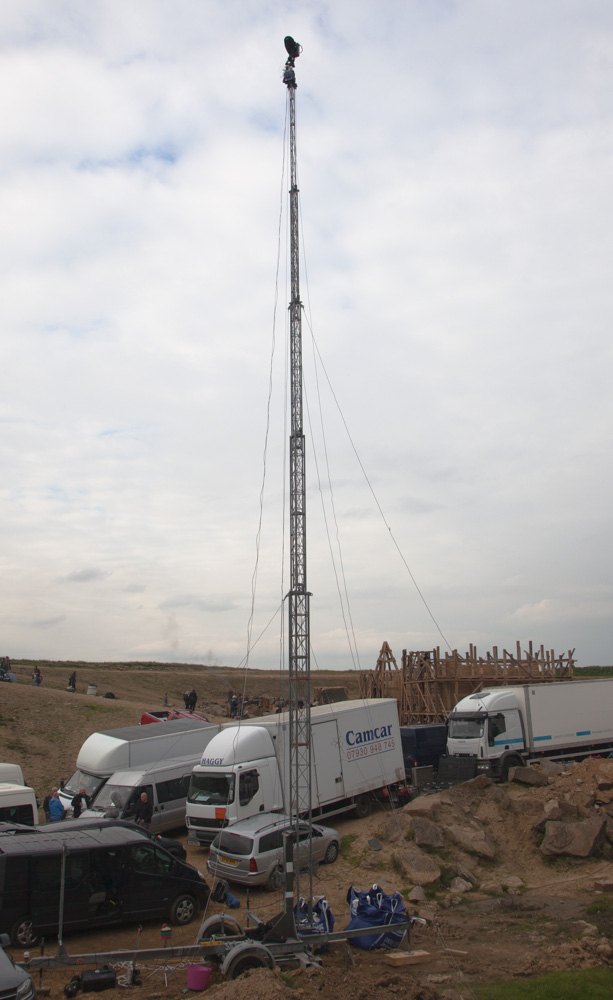
100ft Mast on-set 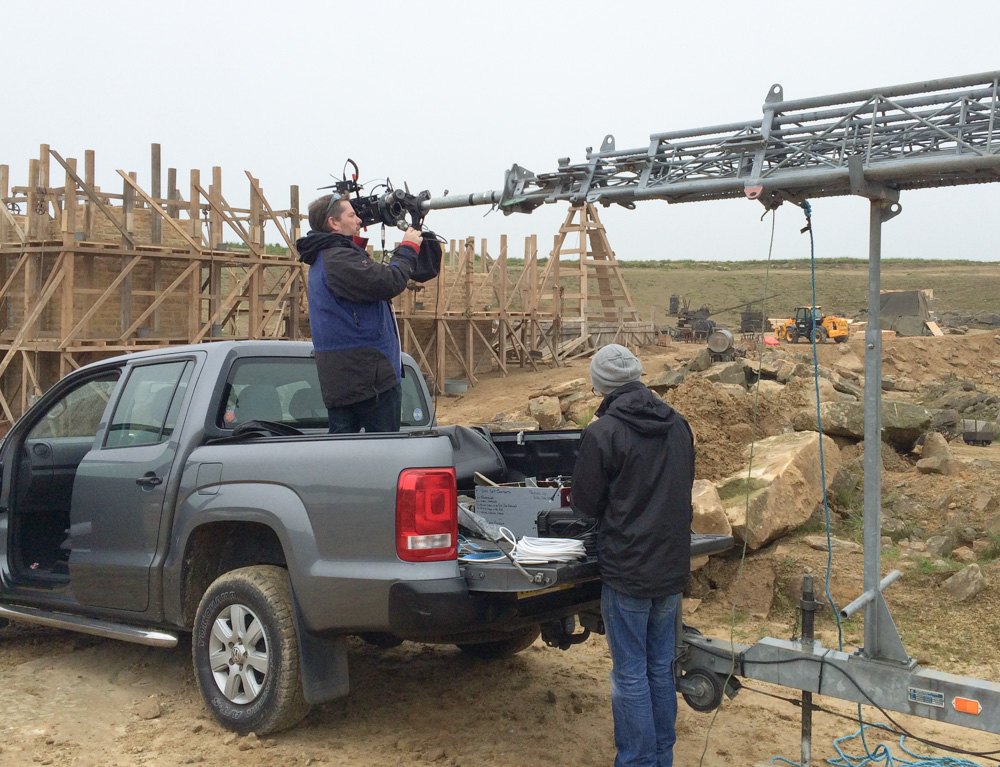
Rigging the head 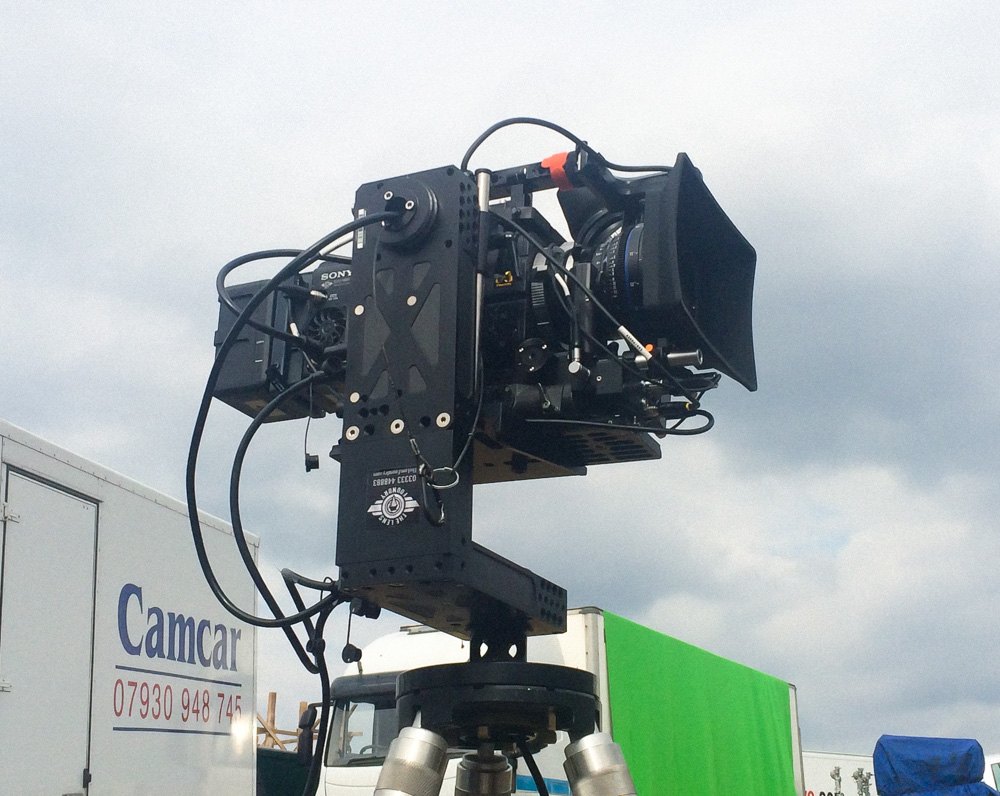
The head and F55
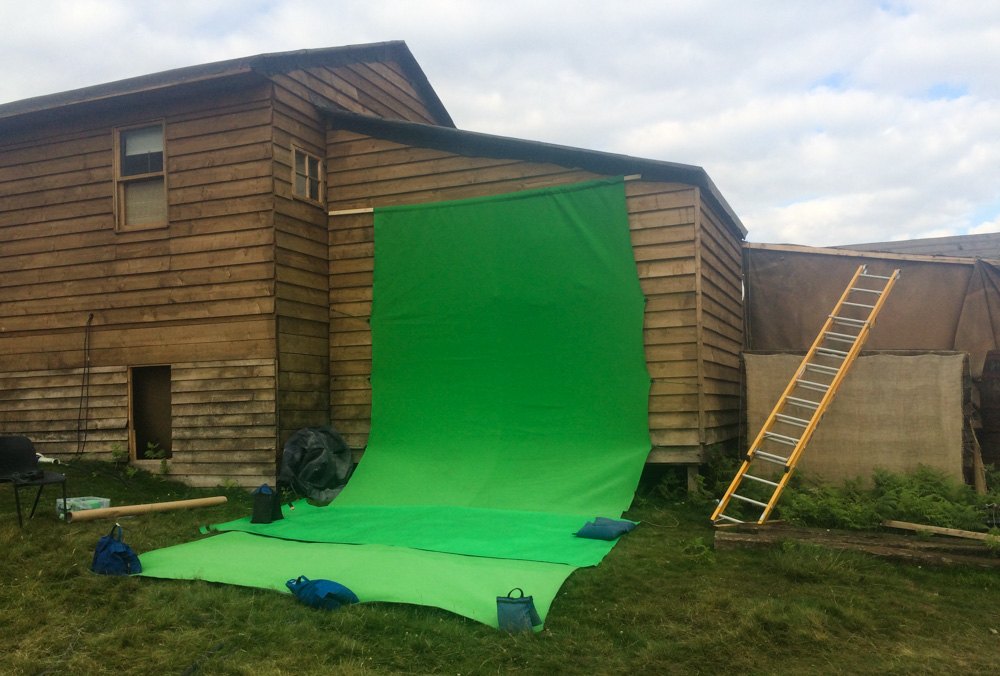
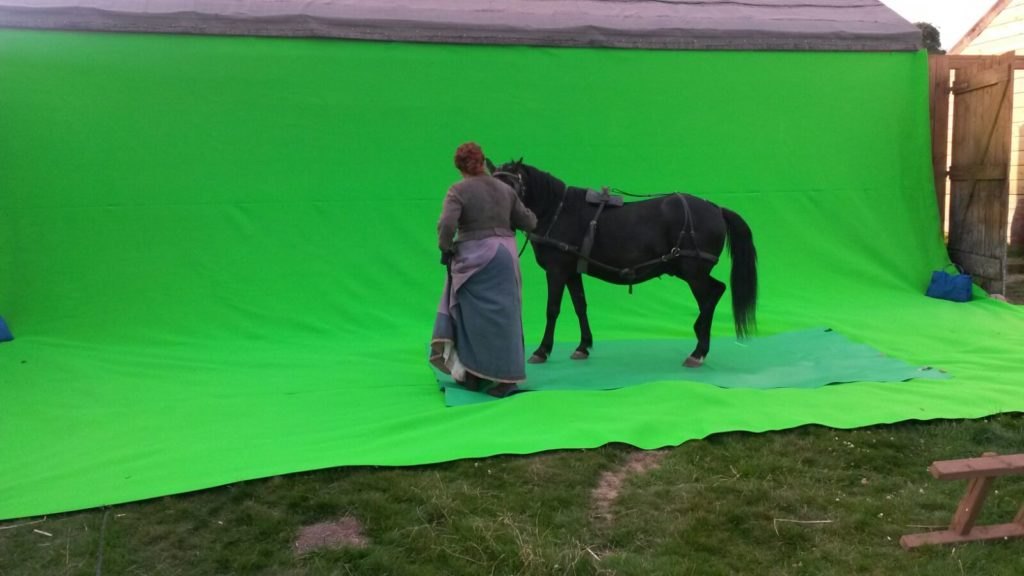
We scanned, filmed and photographed all of the locations that required visual effects. We also captured individual elements used to populate our scenes. The example below was used to capture SA’s for a range of actions on and around the CGI structures. You’ll notice that we rigged a larger screen for travelling action with the occasional horse.
Two Locations in One
Towards the end of the shoot, the narrative had a re-write, and we were asked to create a mine. The idea was to use two of existing locations, but it couldn’t look like somewhere we’d been before. It was agreed to build the entrance at the back of the quarry, and top it off with a rock formation found at the end of the town location. The combination of the two would be different, enough. Although the theory was quite simple; comp the best bits of two places together, the challenge was the locations themselves.
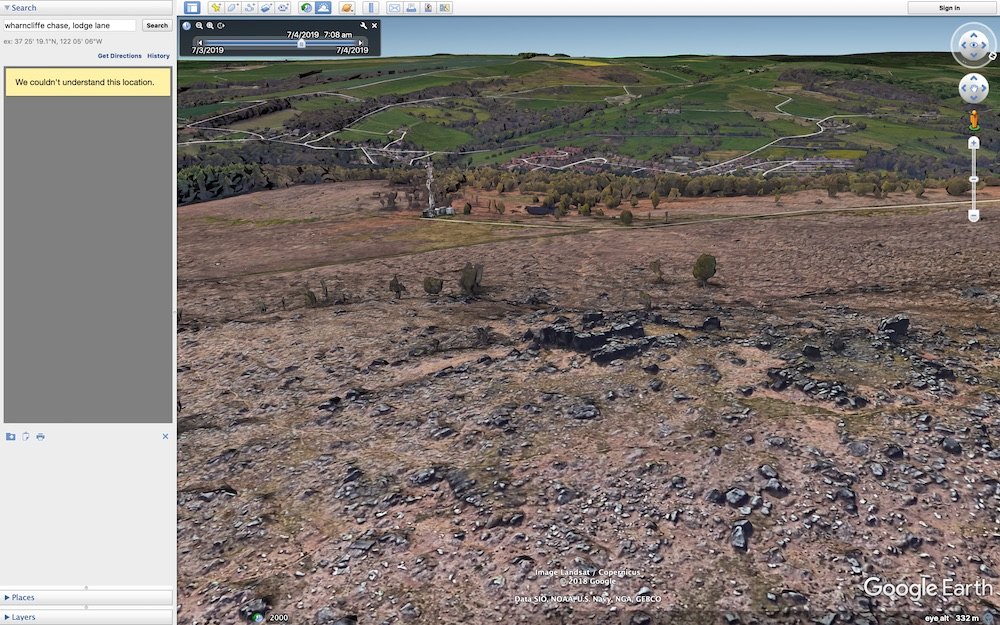
For the shot to be successful, both plates would need to be captured in the same light conditions from the same angle. The mine entrance set the scene, for which the rocks had to match. It was quite a challenge getting to where the stones are, so a bit of pre-planning was needed.
Having the two exact coordinates, we used Google Earth to find the correct angle from the virtual scene. Then using the lighting tool, we could figure out the precise time of day we needed to be at the location when the light matched the background plate. It saved us a ton of time and enabled us to run a minimal unit. The final effect was seamless.
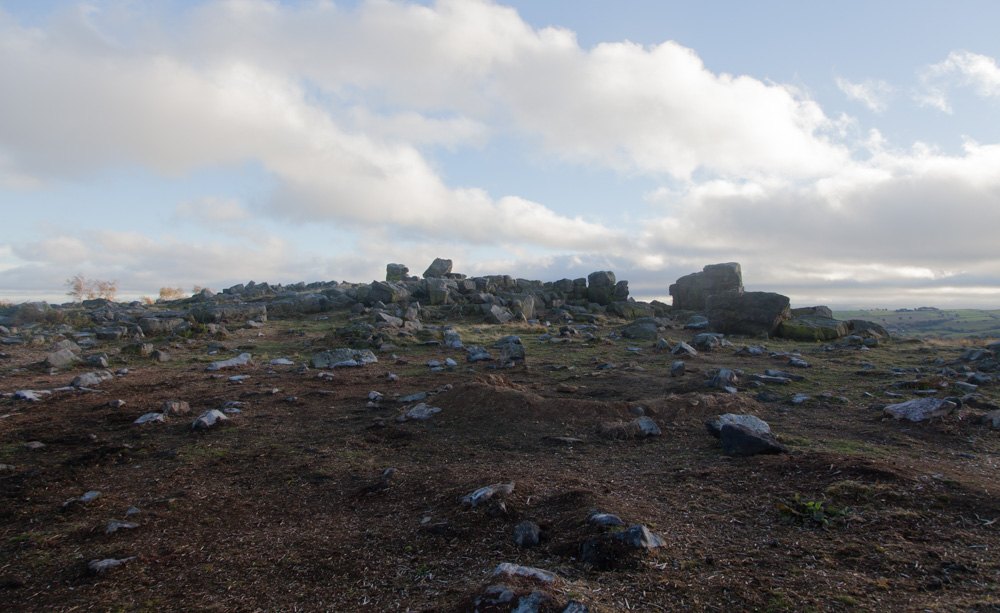
A shot of the Craggs 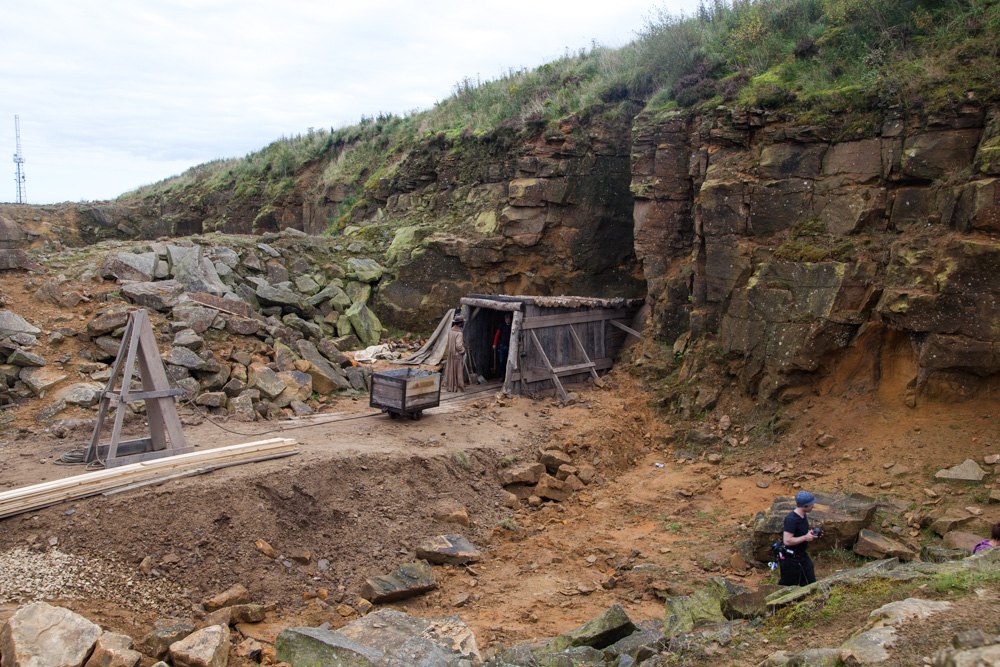
The Mine entrance set
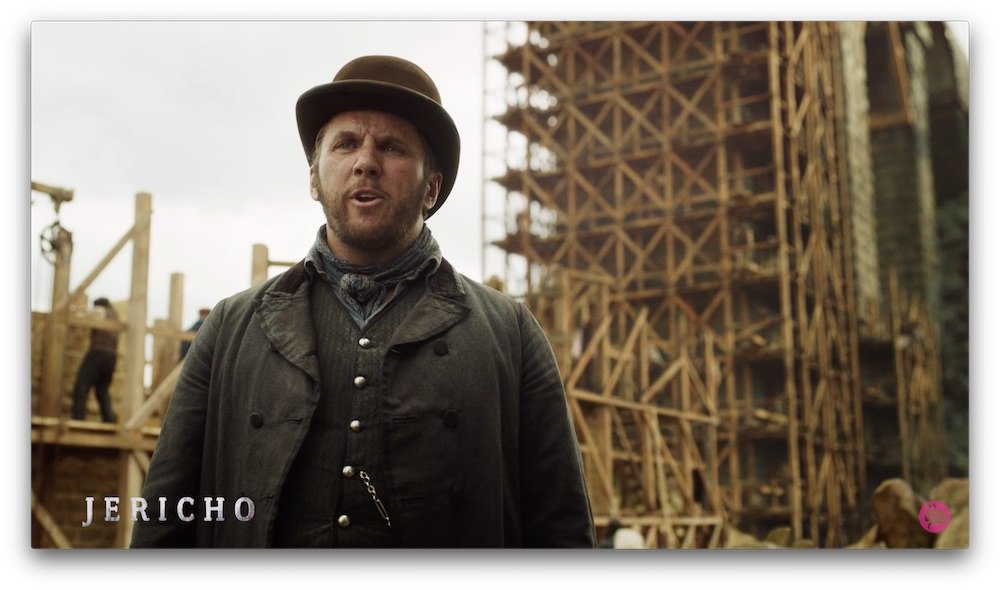
We accomplished a lot of other shots across the show, some that were meticulously planned and others that appeared in the cut. All in all, it was an effects-heavy show with a wide range of physical and digital techniques, used in combination to achieve the best results, on budget and on time.